How to Record a Video Podcast: Upgrade the Existing Professional-Set Guide
How to Record a Video Podcast: The Short Version
If you want to know how to record a video podcast and get an episode published fast, the shortest path is simple: define your niche and format, set up a camera and microphone in a quiet space, add basic lighting and a clean background, choose recording software, run a test, and then record. Whether you're a solo creator, interviewer, marketer, or business building a show in a studio or from home, that workflow is enough to start strong — and it's worth getting right because video podcasts are now a major discovery, engagement, and monetization channel, not just an add-on to audio.
If you want to start producing content for a video podcast today, here's the quickest path from idea to published episode:
- Define your niche and format - solo, co host, or interview.
- Set up a basic camera and microphone in a quiet recording space.
- Arrange simple lighting and a clean background.
- Choose your podcast recording software - local or remote.
- Test, then hit record.
The full process breaks down into seven repeatable steps. First, plan your topic and episode structure so you know exactly what you'll cover. Second, decide your recording style - are you recording solo in a home office, sitting across from a guest in a podcast studio, or using a platform to record remotely with guests in different locations? Third, set up your camera at eye level and position your mic close to your mouth. Fourth, arrange at least one soft light source and tidy your background. Fifth, select your recording software - a remote platform for interviews or local capture for in-person sessions. Sixth, run a short test recording and play it back with headphones to check audio quality and framing. Seventh, record your episode. From there, the rest of the guide walks through the parts that usually make or break production: equipment choices, in-person and remote recording setups, testing, editing, publishing, repurposing clips, and the common mistakes that waste time or hurt quality.
Here's what this looks like in practice: a solo host records a 45-minute interview in 1080p with a guest joining remotely. The host uses a USB microphone, a webcam, and a single softbox light. The remote platform captures separate tracks for each participant. After recording, the host syncs and trims the footage, exports the video for YouTube, extracts the audio for podcast feeds, and clips two or three highlights for short clips on social media — with more info on setup or editing worth checking if you want to refine the workflow further. Total active time beyond the conversation itself: roughly 30 minutes of setup and testing, plus an hour or two of editing.
The core takeaway before you read further: clear audio, consistent framing, and simple editing matter far more than expensive equipment. Prioritize sound quality and a stable setup - the rest you can upgrade over time.
What Is a Video Podcast in 2026?
A video podcast - sometimes called a vodcast - is an audio-based podcast augmented by synchronized on-camera video. It isn't simply a recording of a conversation uploaded to YouTube. It's a show where video is integral to the viewer's experience: body language, visual cues, setting, screen shares, and multi-angle shots all play a role in how the audience engages with the content.
By 2026, several common formats have emerged. Talking-head interviews seat a host and guest in a studio or home office. Remote Zoom-style calls connect participants from different locations through networked video. In-studio multi-camera shows use two or three cameras to capture multiple hosts, co hosts, and guests from different angles. Screen-share tutorials overlay a host's face on instructional content. Some shows mix formats - alternating between in-person episodes, on-location recordings, live streaming sessions, and panel discussions.
Distribution has matured rapidly. uTu now reports over one billion monthly vodcast viewers worldwide, making it the largest discovery platform for podcasts and the go-to engine for younger listeners. Spotify video podcasts host more than 250,000 video-enabled shows, allowing listeners to watch or listen depending on context. Apple Podcasts introduced video support with seamless switching between audio and video in early 2026, giving creators even more flexibility. RSS-based apps increasingly support video feeds as well, meaning you can deliver video across multiple platforms from a single workflow.
On the technical side, most video podcasters aim for at least 1080p resolution (1920 × 1080) as a baseline, with more advanced setups capturing 4K (3840 × 2160) for cropping flexibility and future-proofing. Frame rates typically sit at 24, 25, or 30 fps depending on region and aesthetic preference. Audio is recorded in stereo - often as multi-track files (each speaker on a separate track) using uncompressed WAV or high-bitrate AAC for distribution.
Why Record a Video Podcast Instead of Audio‑Only?
For creators and businesses in 2026, adding video to a podcast is no longer experimental - it's a strategic decision backed by concrete advantages.
- Higher discoverability. YouTube's algorithmic recommendations surface video podcasts to audiences who may never search a podcast directory. Roughly 57% of Americans aged 12 and older both listen to and watch podcasts by early 2026, and younger demographics - Gen Z and millennials - overwhelmingly prefer video for discovery.
- Reusable short clips. A single 60-minute episode can yield four or five quote-segments perfect for TikTok, Instagram Reels, and YouTube Shorts. This clip strategy is now industry standard among growing shows; 72% of podcasts launched in the past 12 months publish a video version in part because of repurposing potential.
- Stronger audience connection. Viewers perceive extra authenticity when they see a host's facial expressions and body language. This builds loyalty, increases watch time, and translates into better sponsorship opportunities - video content typically commands higher CPMs than audio alone.
- Better analytics. Video platforms provide watch time, audience retention curves, drop-off points, and demographic data that audio-only downloads simply cannot match. These metrics help you refine content episode by episode.
- Premium monetization. Sponsorships with visual brand integration, product placement, and premium subscription content all become possible once you have video assets.
Consider a practical example: a business records weekly 60-minute interview episodes. During editing, the team flags five standout moments of 30–60 seconds each, adds text overlays, and publishes them as Reels and Shorts on LinkedIn, Instagram, and TikTok throughout the week. Traffic flows back to the full YouTube video, engagement grows, and sponsors pay a premium for the combined reach.
The trade-offs are real but manageable. Video requires more setup time, generates larger files (often several gigabytes per hour of 1080p footage), and demands at least basic on-camera presence. But as the data shows - video consumption overtook audio-only among weekly podcast consumers in Q3 2025 - the shift is decisive.
Decide Your Video Podcast Format Before You Hit Record
Before you invest in gear or schedule your first guest, plan your episode format. The format you choose determines every downstream decision - equipment, recording process, and editing complexity.
- Solo monologue or teaching format. One camera, one microphone, one person. This is the simplest to record and edit. Great for educational content, commentary, or tutorial-style shows. You control pacing entirely, and turnaround from recording to publishing is fast.
- In-person interview or co host show. Two or more people seated around a table, each with their own mic. You'll likely want at least two camera angles - a wide shot of everyone and a tighter shot on the active speaker. Editing is more involved (angle switching, balancing multiple audio tracks), but the dynamic conversation tends to resonate with audiences. Guest-driven shows have a median audience of roughly 2,500 listeners versus about 1,500 for solo formats.
- Remote interview format. Hosts can record remotely with guests in different locations using podcast recording software like Riverside, Zencastr, or a similar platform. Each participant's audio and video is captured locally, then synced in the cloud. This format opens the door to guests anywhere in the world, but depends on stable internet connection and guest cooperation with basic tech setup.
- Hybrid and experimental formats. Panel discussions with three or more remote participants. Live-streamed episodes where the audience interacts in real time. Audio-first podcasts that add video for select episodes. Each hybrid format layers additional complexity - more tracks to manage, more points of failure, more editing - but also more variety for your audience.
Choose the format that matches your resources and content goals right now. You can always evolve.
Plan Your Episode So It Works On Video
Pre-production planning is essential for a successful video podcast. A loose plan prevents awkward pauses, keeps conversation focused, and makes video editing dramatically easier.
Start by defining a single clear promise for the episode - what will the viewer learn, feel, or be able to do by the end? This shapes every segment that follows.
Create a simple episode outline rather than a word-for-word script. Use bullet points or talking points to guide discussions: an intro (who you are, what the episode covers, why it matters), three to five key points or interview questions, and a closing call-to-action. It can also help you shape your voice in the intro or closing so the delivery feels natural on camera. Scripts tend to sound stiff on camera; outlines keep conversation natural while preventing rambling.
Plan your visuals. Identify moments where a screen share, B-roll clip, or on-screen graphic would reinforce a talking point. Even a simple lower-third title or a full-screen quote card adds visual variety that keeps viewers engaged.
If you're hosting guests, prepare thoughtful questions for guest interviews and send them a run-of-show document ahead of time. Include time expectations (total recording length, segment breakdown), basic tech prep instructions (quiet room, headphones, camera angle), and a note that the conversation can be edited - this reduces pressure. Guests who know what to expect perform better on camera.
Choose a Recording Location and Set the Scene
Your recording location directly affects video quality and the trust viewers place in your show. Most people don't need a professional podcast studio - a dedicated corner of a quiet room works if you set it up intentionally.
Choose a space with minimal echo and low background noise. Recording in a quiet space minimizes background noise and prevents issues that are difficult to fix in post-production. Avoid rooms with hard floors and empty walls, which create unwanted echo. If your only option is a sparse room, adding rugs and curtains can soften echo in recordings significantly.
Create a visually intentional background that reflects your podcast's theme. A bookshelf, a few plants, subtle wall art, or a simple branded backdrop all work. The goal is a background that looks deliberate without distracting from you. Remove clutter, hide cables, and check what the camera actually sees - not what your eyes see.
For framing, position your camera at eye level for a natural appearance. Place yourself roughly in the center of the frame or offset slightly using the rule of thirds. Leave a small amount of headroom above your head, and keep enough space between yourself and the background to create visual depth.
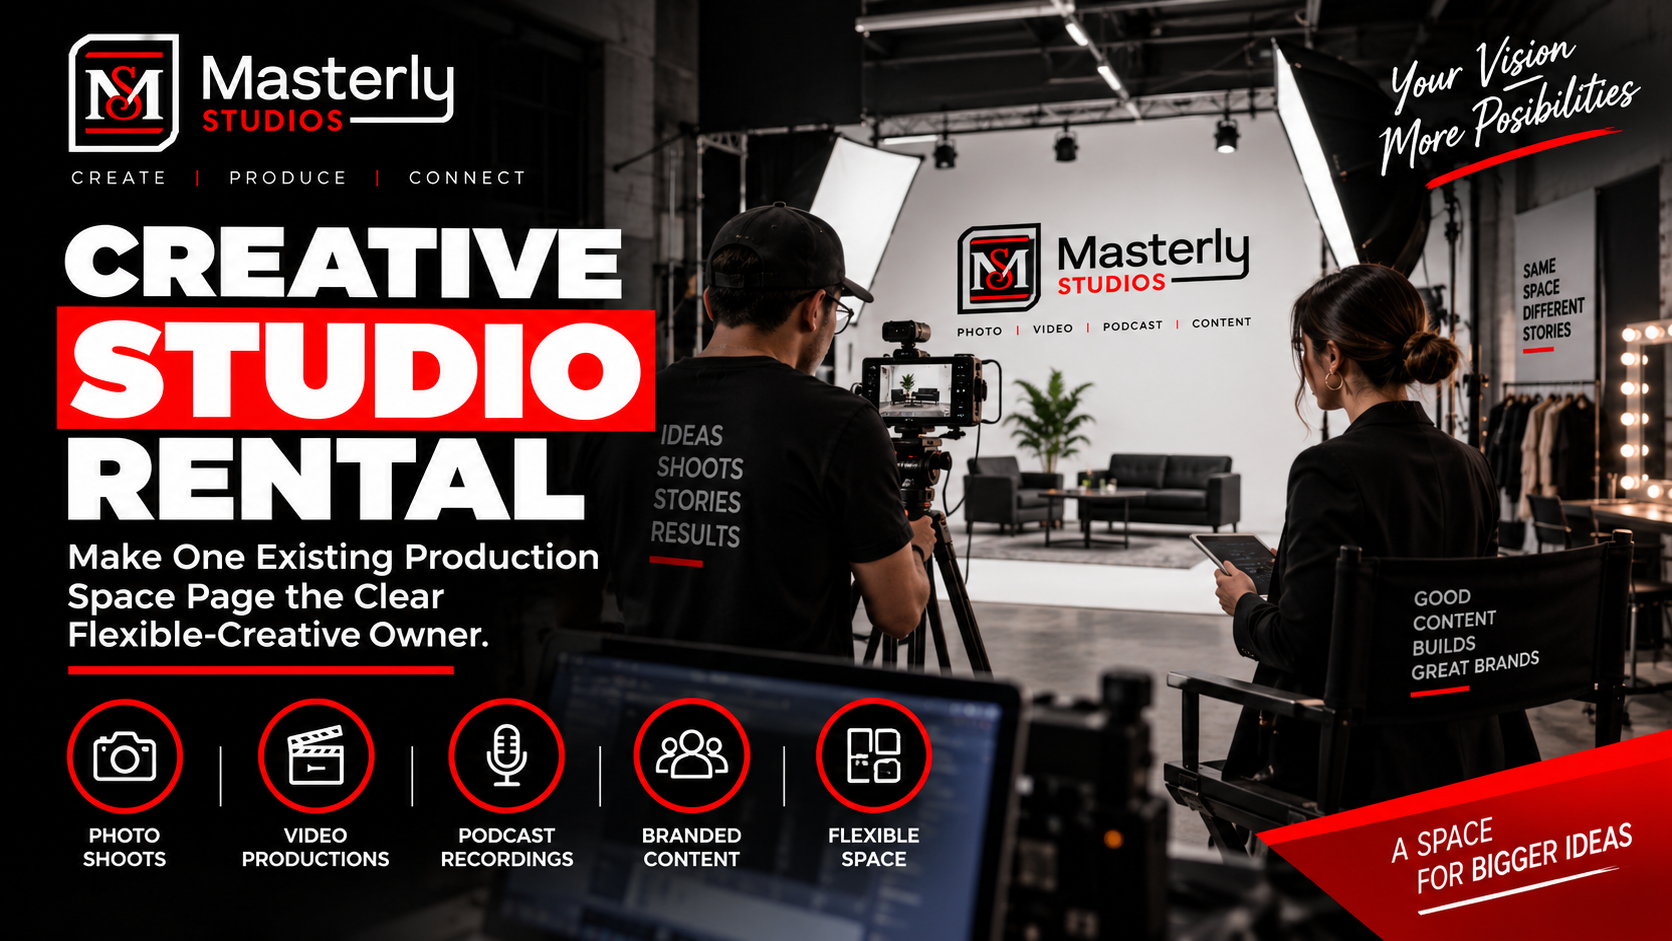
Your setup options range widely. A home office is the most accessible starting point. A rented podcast studio gives you pre-built lighting, soundproofing, and multi-camera rigs without the overhead. On-site recordings at events or client locations add production value but require portable gear and more advance planning.
Prepare Your Space for Good Sound Quality
Sound treatment deserves its own attention because the goal is not just cleaner audio but a clearer voice that listeners can understand easily without echo or room noise. Muffled, echoey, or noisy audio drives listeners away faster than a slightly dim image.
Soft furnishings absorb sound reflections. Rugs on hard floors, heavy curtains over windows, a couch or upholstered chairs in the room, and blankets draped over hard surfaces all reduce reverb. Using acoustic panels on the wall behind you and on the wall you face can improve sound quality meaningfully - even two or three panels make a difference.
Turn off noisy devices 10–15 minutes before recording. HVAC systems, refrigerators, desktop fans, and buzzing lights all generate background noise that microphones pick up. Close windows if street noise is an issue. Choose times of day when ambient noise is lowest - early mornings or late evenings in residential areas.
Record room tone by remaining silent for 5–10 seconds before speaking. This gives your editing software a clean noise profile to work with if you need to reduce residual background hum in post-production.
Build a Video Podcast Setup That Matches Your Budget
A basic video podcast setup includes a camera and microphone - you can begin with gear you already own and upgrade gradually. The key is knowing where to spend first: audio always comes before camera upgrades.
Starter setup. A smartphone or modern webcam for video, a USB microphone on a desk stand, natural window light or a single LED panel, and free recording software. This is enough to produce a clean, watchable episode if your room is quiet and your lighting is decent.
Intermediate creator setup. A dedicated 1080p or 4K webcam (or a mounted smartphone with locked exposure), a dynamic USB or XLR mic with a basic audio interface, a two-light kit (key light plus fill), acoustic panels, and a tripod or articulating arm. At this level, your production quality starts to feel polished and consistent.
Pro studio-style setup. A mirrorless or DSLR camera with interchangeable lenses, an XLR microphone per speaker connected through a multi-channel audio interface, three-point lighting (key, fill, backlight), full acoustic treatment, a capture card for camera-to-computer connection, and a professional non-linear editor. This tier supports multi-camera shoots, live streaming, and broadcast-grade output.
At every tier, invest in a good microphone for better audio quality before upgrading your camera.
Pick the Right Camera for Your Video Podcast
Any camera that records clean 1080p in 2026 can work if lighting and audio are solid. The differences come down to control, flexibility, and how much you plan to crop or repurpose footage.
Laptop webcams offer maximum convenience - no extra gear, no setup - but give you limited control over exposure, depth of field, and low-light performance. Fine for casual recordings or getting started; not ideal long-term.
Dedicated webcams are a great option for most podcasters. Modern webcams can provide 1080p or 4K video quality, plug directly into your computer via USB, and require no additional software. They work especially well for remote podcasts where simplicity matters.
Smartphones are more capable than many people realize. Smartphones can be used to record high-quality video podcasts - mount your phone horizontally on a tripod, lock the exposure and focus, and pair it with an external mic. A current-generation iPhone or flagship Android phone shoots excellent 4K video with strong auto-stabilization.
Mirrorless and DSLR cameras deliver the best image quality: shallow depth of field that blurs backgrounds naturally, wide lens selection, and full manual control. A DSLR camera or mirrorless body does require more setup - you'll typically need a capture card or direct USB streaming capability, continuous power via a dummy battery, and more time to configure settings. Aim for 1080p or 4K, 24–30 fps, and ensure the camera can record for the full length of your episode without overheating.
Invest in Reliable Podcast Audio
Viewers forgive imperfect video far more readily than muffled or echoey audio. Your microphone and how you use it matter more than almost any other piece of equipment.
USB microphones connect directly to your computer with no additional hardware. USB microphones are ideal for beginners and easy to use - plug in, select the mic as your input, and record. They're the right choice when you're recording solo or running a simple two-person setup.
XLR microphones connect through an audio interface, which gives you more control over gain, monitoring, and multi-channel recording. XLR setups are standard in professional environments and necessary when you're recording separate tracks for multiple speakers.
For mic type, dynamic microphones reject off-axis noise and are forgiving in untreated rooms - they pick up primarily what's directly in front of them.
Condenser microphones capture more detail and nuance but also pick up more room ambiance, making them better suited to acoustically treated spaces.
Position your microphone close to your mouth for better audio - typically four to six inches away - and give each person their own mic. This helps capture a fuller voice with less room sound. Sharing one mic across a table creates uneven levels and picks up room reflections. Wearing headphones prevents audio bleed during recordings and lets you catch problems like echo, distortion, or feedback in real time.
Lighting Basics for a Professional Look
Good lighting improves production quality more than an expensive camera. A well-lit face on a mid-range webcam will outperform an underlit shot from a cinema-grade lens.
One-light setup. Position your primary light slightly above eye level, roughly 45 degrees to one side. Use a softbox or diffused LED panel - softbox lights help soften hard light and eliminate shadows. This single source handles most of the work for solo recordings.
Natural window light. Natural window light works well for daytime video recordings. Face the window so light falls evenly across your face. Avoid sitting with a window behind you, which turns you into a silhouette. The limitation is consistency - cloud cover and time of day change the light, so try to record at roughly the same time each session. For more info, see our deeper guide to lighting techniques.
Three-point lighting. For a more polished look, use two to three key points of light to set the scene: a key light (your primary source), a fill light (softer, opposite side, to reduce shadows), and a backlight (behind you, aimed at your head and shoulders to separate you from the background). This is the gold standard for studio setups.
Ensure lighting is soft and positioned correctly to avoid harsh shadows. Keep all your lights at roughly the same color temperature - mixing warm tungsten bulbs with cool daylight LEDs creates unflattering tint mismatches. Most LED panels let you dial in a specific Kelvin value; aim for around 5600K (daylight) or match whatever your ambient light provides.
Choose the Right Software to Record Your Video Podcast
Your recording software depends on one fundamental question: are all participants in the same room, or are some joining remotely?
For in-person recording, you can use your camera's internal recording (files saved to an SD card), computer-based capture software like OBS Studio - which provides advanced recording controls for video podcasts - or a dedicated hardware recorder. The advantage here is that everything is local: no internet dependency, no compression artifacts from streaming, and full control over file quality.
For remote recording, you need a platform that captures each participant's audio and video locally, then uploads the files. This avoids the quality loss inherent in compressed video calls. Use a reliable recording platform to capture high-resolution audio and video from every participant.
Key features to look for in 2026: local recording (not just cloud capture), separate audio and video tracks for each participant, automatic cloud backup, and simple export presets for YouTube and podcast feeds.
Recording Remote Video Podcasts
Remote recording tools let you record remotely through a browser or lightweight app while capturing local files. Each participant's device captures audio and video locally at full quality while a lower-resolution preview stream keeps the conversation flowing. Once recording ends, local files upload to the cloud and sync automatically.
Three broad categories dominate:
- Dedicated podcast platforms - tools like Riverside and Zencastr are built specifically for podcast recording. Riverside is ideal for remote podcast recording, offering separate tracks, high-resolution local capture, and features like magic clips for automated highlight extraction. Zencastr offers cloud-based workflows for remote recording with a straightforward guest experience. These platforms prioritize audio and video quality over real-time collaboration features.
- Mainstream video call tools - Zoom, Microsoft Teams, Google Meet. Familiar to most people and guests, easy to join, but they compress audio and video aggressively. Quality is lower, and you typically get a single mixed track rather than separate tracks per speaker. Fine for casual conversations; limiting for polished production.
- Live-streaming software - OBS Studio, Streamlabs, and similar tools can record locally while simultaneously streaming to platforms. These give maximum control and support live streaming with audience interaction, but they have a steeper learning curve and require more configuration.
Pick based on your priority. For simplicity and guest ease, mainstream call tools work. For quality and editing flexibility, dedicated podcast platforms win. For live audience interaction and advanced control, streaming software is the path.
Common Remote Recording Issues and Quick Fixes
Remote interviews introduce predictable problems. Here's what to expect and how to handle each:
- Echo on the guest's end. Ask guests to wear headphones - this single step eliminates most echo issues. Any wired earbuds or over-ear headphones will do.
- Choppy or frozen video. Usually caused by bandwidth limitations. Have the guest switch to a wired internet connection, close unnecessary browser tabs and apps, and lower their camera resolution if needed.
- Delayed or out-of-sync audio. Separate track recording largely solves this in post-production. If using a platform without local recording, ask the guest to record audio on their phone as a backup.
- Background noise on the guest's side. Request that guests find a quiet space, close doors and windows, and turn off fans or appliances. Remind them before recording day in your prep email.
Always have a backup recording method running when possible - a local screen recording on your computer or a second device capturing audio only gives you a safety net if the primary platform fails.
Step‑by‑Step: How to Record an In‑Person Video Podcast
Recording in person gives you the most control over sound, lighting, and energy. Here's the complete walkthrough from setup to shutdown.
Step 1: Set up the room. Position your table and chairs, decide what the camera will see behind you, and remove anything distracting from the frame. If you're hosting a guest, set their seat so both of you face the cameras naturally.
Step 2: Place cameras. Set one camera on a wide shot capturing all speakers. If you're using a second camera, position it for a tighter close-up of the active speaker. Check framing on your monitor - confirm eye-level positioning, headroom, and that nothing awkward crops into the edges. Lock focus so it doesn't hunt during the conversation.
Step 3: Set up microphones. Give each person their own mic at the correct distance from their mouth (four to six inches). Test levels by speaking at your normal recording volume - watch for peaking (the meter hitting red) and adjust gain on your audio interface or recorder. Record separate audio and video tracks for easier editing later.
Step 4: Dial in lighting. Balance your key and fill lights, check for harsh shadows on faces, and verify the image on your camera's screen or external monitor. Adjust backlight if you're using one. Make sure the color temperature of all sources matches.
Step 5: Run a test recording. Record one to two minutes, then play it back with headphones. Perform a test recording to check audio and video levels before going live. Listen for room echo, background hum, plosives, or uneven volume. Look at framing, focus, and exposure. Make quick adjustments.
Step 6: Record the episode. Start all devices, then use a clap sync at the beginning for audio and video synchronization - a single sharp clap visible on camera and audible on all mics gives you a reliable sync point in editing. Include a verbal slate: episode number, date, guest name. Then talk naturally. Maintain energy and look at the camera when speaking to the audience.
Syncing Multi‑Camera and Audio Setups
When you use more than one camera or record audio on a separate device, sync becomes critical. Without it, lips won't match words, and angle cuts will feel jarring.
The simplest method: perform a visible clap at the beginning of each recording session. Every camera and microphone captures the same sharp transient, and your editing software can align all tracks to that single spike.
For advanced users, timecode generators and automatic waveform-matching features in modern editing software (like DaVinci Resolve or Adobe Premiere) handle sync automatically across multiple sources. These tools analyze audio waveforms and snap tracks into alignment.
Keep all cameras rolling continuously throughout the episode. Stopping and restarting a camera mid-session creates a second sync point you'll need to manage and increases the risk of missing a reaction or losing continuity.
Step‑by‑Step: How to Record a Remote Video Podcast
Remote video podcasts introduce unique challenges: internet stability, guest tech setup, and platform limitations. A disciplined pre-recording process prevents most problems. The aim is to record remotely with reliable local capture and separate tracks, not just hold a normal video call.
Step 1: Choose a platform and create a test session at least a day before the real recording. Confirm that the platform records separate tracks and supports local capture. Test with a colleague or friend to understand the interface before your guest sees it.
Step 2: Send guests a prep email covering essential details: what mic and headphones to use (even phone earbuds help), how to find a quiet room, how to frame themselves on camera (eye level, clean background), and the session link with join instructions. Clear preparation makes remote guests feel confident.
Step 3: On the day, have everyone join 10–15 minutes early. Check video framing, audio levels, and backgrounds. Confirm that the guest's mic is selected correctly and that they can hear you clearly.
Step 4: Enable separate track recording for each participant. This ensures you get clean, independent audio and video files - essential for balancing levels, removing noise, and cutting between speakers in editing.
Step 5: Record a brief 30-second test clip. Play it back quickly. Then start the real episode. At the end, remind guests not to close their browser window until all local files have finished uploading to the cloud - closing early can corrupt or lose footage.
Testing Your Setup Before Every Session
Five minutes of testing can save an entire episode. Skipping this step is one of the most common - and most preventable - mistakes many podcasters make.
Test your equipment before recording to avoid issues. Check these items every time:
- Microphone input selection - confirm your computer or recording platform is using the correct mic, not a built-in laptop mic.
- Recording levels - speak at normal volume and watch the meters. Peaks should sit around -12 to -6 dB, never hitting 0.
- Camera focus and framing - verify sharpness, eye-level positioning, and that nothing has shifted since last session.
- Lighting consistency - turn on all lights and check the image. Ambient light changes with weather and time of day.
- Storage space - confirm you have enough free disk space for the full episode. A one-hour 1080p recording can consume several gigabytes.
- Power sources - plug in your camera, laptop, and audio interface. Battery deaths mid-recording are unrecoverable.
Record a short test clip and actually play it back with headphones. Confirm audio clarity, stereo balance, and that audio and video are in sync. Consider creating a simple pre-recording checklist - a printed one-page sheet you run through before every episode. Establish a repeatable workflow for consistent video podcast production.
Basic Editing Workflow for Video Podcasts
Editing can be minimal, but it should always include cleaning audio and removing major distractions. Even a light edit transforms raw footage into something viewers will stay with.
The standard editing sequence: import all footage and audio files, sync audio and video tracks (using your clap sync or software auto-align), assemble the main cut in timeline order, trim mistakes and long silences, check for voice cleanup or consistency, add your intro and outro, and export. Edit videos to remove dead air and enhance pacing - but resist the urge to over-edit. Natural pauses and authentic reactions make video podcasts feel human.
For multi-camera episodes, keep angle switching purposeful. Cut to the speaker who's talking or to a reaction shot during a strong moment. Avoid rapid, unmotivated cuts - they distract rather than enhance. For solo or single-camera shows, you can use subtle zooms or B-roll inserts to break visual monotony.
Post-production should include normalizing audio levels and color correction. Loudness normalization ensures all speakers sit at the same perceived volume - critical when one person's mic was closer than another's. A quick white-balance and exposure correction across clips keeps the visual tone consistent.
Back up recordings immediately after the session to prevent data loss. Copy raw files to at least two locations (external drive plus cloud storage) before you begin editing.
Choosing Software for Editing Video Podcasts
Three levels of editing tools serve different needs:
- Beginner-friendly editors - tools like Descript allow text-based editing for podcasts: you edit the transcript, and the video follows. Low learning curve, fast turnaround, ideal for solo creators who want to publish quickly. Adobe Podcasts records high-quality audio locally and integrates with Adobe's editing ecosystem.
- Full non-linear video editors - DaVinci Resolve (free tier available), Adobe Premiere Pro, and Final Cut Pro give you complete timeline control, multi-track editing, color grading, and effects. Steeper learning curve, but necessary for multi-camera shows or visually complex episodes. Adobe Audition pairs well for dedicated audio cleanup before bringing tracks into a video editor.
- AI-assisted tools - several platforms now auto-detect highlights, generate short clips, remove filler words, and suggest cuts based on transcript analysis. These tools save significant time for growing shows with weekly publishing schedules.
Start with editing software that runs smoothly on your current computer and supports common formats like MP4 and MOV. Upgrade when your workflow - not your ambition - demands it.
Exporting and Publishing Your Video Podcast
Export settings determine how your final video looks and sounds on YouTube, Spotify, Apple Podcasts, and every other platform where your audience finds you.
Export final videos in high quality with formats like H.264 or MP4. For most shows, these practical settings work well: 1080p resolution (matching your recording resolution), your original frame rate (24 or 30 fps), a bitrate between 10–15 Mbps for clean visuals without bloated file sizes, and stereo audio at 192–320 kbps AAC or higher.
Create a thumbnail that clearly communicates what the episode covers - a close-up of the host or guest with bold, readable text and contrasting colors.
Write a title and description using specific language about the episode's topic; vague titles get skipped.
Two main publishing paths exist. Video-first: upload the full video to YouTube, then extract the audio track and distribute it through your podcast host to Apple Podcasts, Spotify, and other directories. Audio-first: publish the audio episode to podcast feeds, then upload the video to YouTube and Spotify video. Either path works - the important thing is publishing on multiple platforms to increase audience reach.
Upload video podcasts to platforms like YouTube and podcast hosts for distribution. YouTube is the largest discovery platform for podcasts, so treat it as a primary channel, not an afterthought.
Repurposing One Recording Into Multiple Pieces of Content
A single episode is a content engine. Repurposing content can generate weeks of additional material from one recording session.
During editing, flag standout quotes, surprising moments, or concise explanations - these become 30–60 second vertical clips for TikTok, Instagram Reels, and YouTube Shorts. Many editing tools and dedicated podcast platforms now offer automated highlight detection that identifies clip-worthy moments based on transcript and engagement patterns.
Beyond short clips, the same recording can fuel text-based content: pull quotes for social media posts, write a blog recap summarizing the episode's key points, or draft an email newsletter highlighting the most valuable insight. Each piece drives traffic back to the full episode and broadens your reach across multiple platforms.
Common Mistakes When Recording a Video Podcast (and How to Avoid Them)
Avoiding a handful of predictable errors makes a new show feel significantly more professional from episode one.
- Poor audio quality. The most damaging mistake. Fix: invest in a decent external mic, position it close to your mouth, record in a quiet space, and always monitor with headphones.
- Cluttered or distracting background. Fix: simplify to one or two intentional elements (a plant, a bookshelf, a framed poster) and remove everything else from the camera's view.
- Low or unflattering camera angle. A laptop on a desk points up at your chin. Fix: raise the camera to eye level using a desk stand, tripod, or stack of books.
- Inconsistent lighting. Fix: set up at least one dedicated light source and avoid relying solely on overhead room lights, which cast downward shadows.
- Skipping the test recording. Fix: record 60 seconds, play it back, adjust, then start the real episode. Every time. No exceptions.
- Over-editing. Cutting every pause and "um" makes conversation sound robotic and editing takes three times longer. Fix: remove only genuinely distracting moments and keep the natural rhythm.
- Not backing up files. Fix: copy raw recordings to a second location immediately after the session.
It's better to publish consistently and improve over time than to delay indefinitely chasing perfection. Many podcasters who started podcasting with minimal gear built loyal audiences before ever upgrading their setup. Review analytics after each episode to improve - watch time, drop-off points, and audience retention curves tell you exactly what's working.
Frequently Asked Questions About Recording Video Podcasts
What equipment do I absolutely need to record a video podcast?
At minimum: a camera (smartphone, webcam, or dedicated camera), an external microphone, headphones, basic lighting (a window or a single lamp), and recording software. Of these, the microphone and a quiet recording space should be prioritized first - they have the greatest impact on perceived quality. Everything else can be upgraded over time as your show grows.
Can I record a professional‑looking video podcast with just a smartphone?
Yes. Smartphones can be used to record high-quality video podcasts when set up correctly. Mount your phone horizontally on a tripod, lock the exposure and focus so they don't shift mid-conversation, pair it with an external microphone (a clip-on lavalier or a USB mic connected via adapter), and record in 1080p or 4K. An iPhone or current Android flagship, combined with good lighting and clean audio, produces results that many 2026 shows rely on daily.
How long should a video podcast episode be?
Typical episode length is about 41 minutes, with most episodes falling between 20 and 60 minutes. Educational or tutorial-style shows often perform well at 20–30 minutes. In-depth interviews and conversation-driven formats typically run 45–90 minutes. Notably, longer episodes (90+ minutes) tend to reach approximately 225% higher audience than episodes in the 20–40 minute range - but only when the content justifies the length. Let retention data from your analytics guide your decisions rather than chasing a fixed runtime.
Do I need separate audio and video versions of my podcast?
Publishing both is strongly recommended. About 49% of weekly podcast consumers prefer actively watching video, while roughly 30% let video play in the background, and about 21% prefer no video at all. Video drives discovery and engagement; audio-only serves commuters, runners, and background listeners. Most editing software lets you export an audio-only file (MP3 or AAC) directly from your video project for distribution through traditional podcast feeds. Offering both formats covers the full range of how your audience consumes content.
How do I keep guests comfortable on camera?
Schedule a brief pre-call to build rapport and walk through the format. Share your questions or topic outline in advance - this reduces anxiety without eliminating spontaneity. Give clear instructions on where to look (at the camera lens or at the host's video feed, depending on your preference). Remind them the conversation will be edited, so mistakes aren't permanent. Keep the set simple and minimize the number of people in the room or on the call to reduce performance pressure, and help guests find their natural voice on camera so they feel less stiff.
Invite readers to request a studio session after they understand the workflow.
When your podcast represents your expertise, your company, or your personal brand, the production quality matters.
You do not need to spend your recording day solving technical problems or turning an ordinary room into a temporary production set. A professional video podcast studio gives you the environment, consistency, and support needed to create content that is ready for a wider audience.
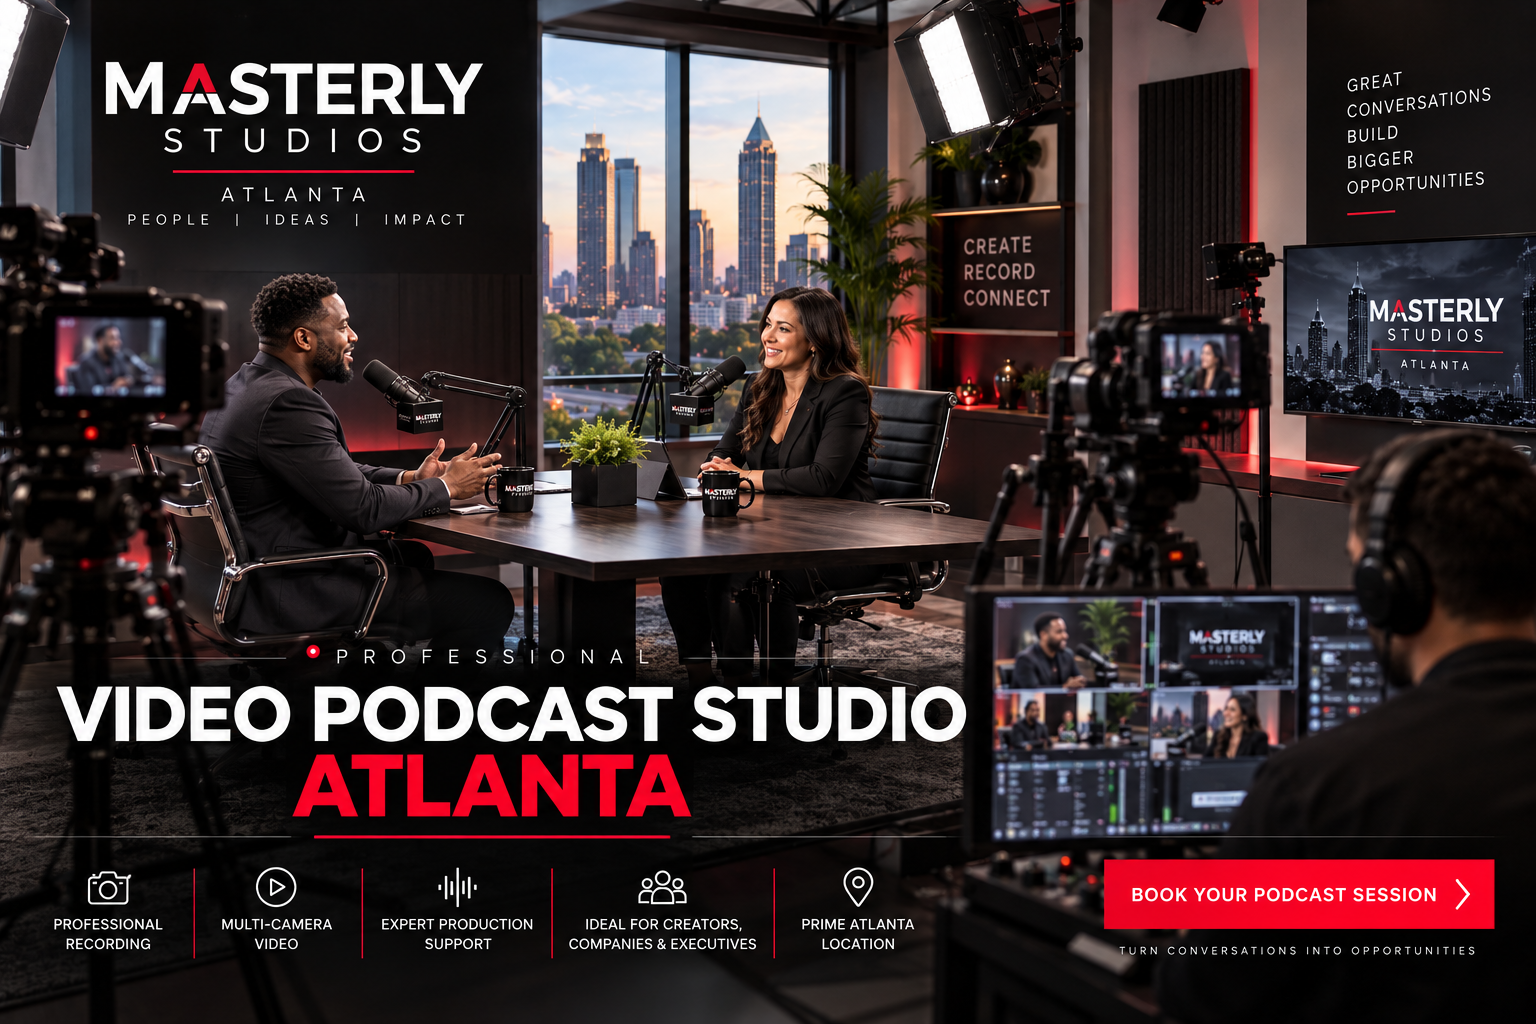
Masterly Studios provides a professional Atlanta setting for creators, companies, and executives who want to record polished video podcasts and business content.
Request a studio session after you understand the workflow and are ready to move your podcast into a professional production environment.
Call (404) 726-7261 or visit www.masterlystudios.com to connect with Masterly Studios and explore the Atlanta studio experience.