Podcast Studio Setup: What a Professional Recording Space Should Include
Introduction: Build a Podcast Studio That Actually Fits Your Show
Any quiet room in your home can become a functioning home podcast studio but only if you think about space, acoustics, and workflow before you start buying equipment. The difference between a podcast that sounds amateur and one that sounds professional rarely comes down to owning the most expensive microphone. It comes down to how well you've prepared the room, positioned your mic, and built habits around consistent audio quality.
If you're asking yourself "What do I really need?", "How much space and budget?", or "Audio-only or video podcast?" - this complete guide answers all three. Whether you're planning a simple desk setup in a spare bedroom, a DIY vocal booth in a walk-in closet, or a full in-person video studio with multiple cameras and branded backgrounds, you'll find concrete examples and realistic budget ranges here.
This guide covers everything from choosing the right space and applying acoustic treatment, to selecting podcast equipment by budget, designing studio layouts for different show formats, testing your setup, and maintaining it over time. By the end, you'll have a clear path from where you are now to a professional podcast studio setup that matches your show's needs - without overspending on extra gear you don't need yet.
Choosing the Right Room for Your Podcast Studio
Room selection impacts audio quality significantly - often more than the price tag on your microphone. A $70 dynamic microphone in a well-treated, quiet room will consistently outperform a $400 condenser in a bare, echo-filled space. Before you shop for any podcast equipment, walk through every room available to you and evaluate it honestly.
Ideal room size depends on how many people will record. For a solo host or duo, a room of roughly 30–80 square feet works well because the smaller volume gives echo less space to develop and reflections are easier to manage. For three to four people - a panel show or in-person interview format - look for 100–150 square feet to accommodate multiple microphones, chairs, boom arms, and possibly cameras and lighting without crowding anyone. Small-to-medium rooms with carpets are ideal for podcasting. Perfectly square rooms (like a 10×10 foot space) tend to create strong standing waves between parallel walls, so a slightly rectangular or irregular shape actually records better.
Common home rooms each come with trade-offs. Bedrooms are often quiet during daytime hours but may share walls that transmit noise. Home offices provide decent isolation but frequently have hard, flat walls and minimal soft furnishing. Walk-in closets are surprisingly effective for solo vocal recording - clothing acts as natural sound absorption - but they're cramped and impractical for video. Basements have hard concrete walls and low ceilings that create reverb and require heavy treatment. Rented coworking rooms or shared studio spaces can offer a more professional finish but limit your schedule and control.
Green-light room features:
- Interior walls (not shared with external-facing surfaces or noisy neighbors)
- Carpeted floor or thick area rug already in place
- Windows that seal firmly or have thick glazing
- Moderate ceiling height (8–10 feet)
- Solid door that closes tightly
- Enough space for boom arms and chairs without crowding
Red flags to watch for:
- Large bare walls and hard surfaces everywhere
- High ceilings (12+ feet) without treatment
- Shared walls with kitchens, bathrooms, or loud neighbors
- HVAC vents directly above your planned mic position
- Thin or hollow doors
- Street-facing windows bringing in vehicle noise
- An air conditioner that cycles on and off during recording
Audio-Only vs Video Podcast Studio Decisions
Video changes everything about your podcast room setup - not just what you hear, but what people see. Once a camera enters the equation, lighting becomes essential, background appearance matters, cable management gets scrutinized, and your layout has to serve both sound and sight.
Here's how the two paths compare:
- Audio-only studios let you focus budget and effort entirely on acoustics and mic quality. Background appearance is irrelevant. You can record in a closet, a treated corner, or anywhere that sounds good - no one sees it.
- Video podcast studios add cameras, lighting rigs (key, fill, back), on-brand background design, and possibly video switchers or a capture card. Every piece of equipment and every cable becomes part of the visual frame.
Typical budget ranges reflect this gap:
- Audio-first entry level: $150–$450 (USB mic, basic headphones, free recording software, minimal treatment)
- Audio-first mid-range: $800–$2,200 (dual XLR mics, quality audio interface, multiple podcast headphones, commercial acoustic panels)
- Video-first entry level: $400–$1,500 (webcam or phone camera, basic LED lighting, simple background)
- Video-first mid-range: $1,500–$3,000 (entry mirrorless camera, two-light setup, branded backdrop, capture card)
- Pro video studio: $5,000+ with multiple cameras, broadcast lighting, switchers, and full treatment
If budget or space is limited, start with audio. Clean, well-treated audio does more for listener retention than good video with bad sound. Most podcasters who started podcasting audio-only and later added video found the transition smoother because their audio foundation was already solid. If your show depends on visual content - product demos, on-screen brand presence, or content you plan to repurpose across multiple platforms - plan for video from the beginning, but still build the audio chain first.
Soundproofing vs Acoustic Treatment: Making Your Room Sound Like a Studio
These two terms get confused constantly, but they solve entirely different problems. Acoustic treatment absorbs echo and controls how sound behaves inside your room - reducing reverb, taming reflections, and evening out frequency response. Soundproofing blocks external sounds from entering a room (or your sound from escaping it) - it's about mass, decoupling, and sealing.
Most podcasters benefit far more from basic acoustic treatment than from expensive construction-level soundproofing. Budgeting for acoustic treatment can yield better audio than expensive gear alone. Many creators buy foam panels expecting them to block traffic noise, but foam has a negligible effect on sound transmission - adding two inches of acoustic foam may add only about 1 dB of transmission loss. Foam absorbs reflections inside the room. Mass is what blocks sound from passing through walls.
What acoustic treatment fixes:
- Echo and flutter echoes between parallel walls
- Boxy, hollow-sounding mid-range frequencies
- Uneven frequency response and late reflections
- Room coloration that makes your voice sound different from how it sounds in person
What usually requires soundproofing:
- Traffic noise from nearby streets
- Loud neighbors or household noise bleeding through shared walls
- HVAC rumble and duct-transmitted noise
- Your podcast recording sound escaping to other rooms
Practical Acoustic Treatment for Realistic Budgets
Early reflection points are your first priority. These are the spots on the walls to your left, right, and behind you where sound from your voice bounces off the surface and arrives back at the microphone a split second later, muddying the recording. Placing absorbers at ear height on side walls, and on the wall directly behind you while speaking, makes the biggest immediate difference. Acoustic panels can significantly improve sound quality even in modest rooms. Corners accumulate bass energy - treating them with bass traps reduces low-frequency muddiness that EQ alone can't fix.
Under $200: Lay a thick rug under the desk. Hang heavy curtains over windows. Fill a bookshelf and position it behind your mic. Soft furnishings like rugs and curtains minimize echo and improve sound. DIY panels using rockwool or mineral wool wrapped in fabric cost very little. Even hanging moving blankets on the wall behind you works. For renters, all of these are portable and temporary.
$200–$800: Commercial broadband absorption panels (two to four), corner bass traps, a ceiling cloud above the desk, thicker curtains, and possibly a diffuser panel on the back wall. This range covers most early reflection points and handles the majority of room issues most beginners encounter.
$800+: Full treatment across all walls and ceiling - a complete suite of broadband panels, well-designed diffusers, thorough bass trapping, and possibly higher-density materials like rigid fiberglass. At this level, your room starts behaving like a professional podcast studio.
Placement priority: Start with the wall behind you (the surface you face while speaking), then side walls at first reflection points, then ceiling above the speaking position. Floors should have rugs. Doors and windows benefit from heavy curtains or weather seals. Don't invest in treating distant walls until the closer reflections and bass buildup are under control.
When You Actually Need Soundproofing
Full soundproofing is justified in specific scenarios: recording during daytime on a ground-floor room facing a busy street, sharing walls with noisy households in an apartment building, or studios located above bars or near constant ambient noise. If others in your household regularly complain about hearing your voice through walls, that's another sign.
Methods include solid-core doors with acoustic seals, double-glazed windows or secondary glazing, sealing gaps with acoustic caulk, mass-loaded vinyl on walls, building double-stud or decoupled walls, and floating floors. Even well-sealed walls leak sound through HVAC ducts, so ductwork needs attention too.
The costs are high and the work is disruptive. Permits or building codes may apply. For renters, it's usually not an option. Practical alternatives include recording during quieter hours, using a close-talk dynamic microphone that rejects background noise, bringing in a portable isolation booth, or renting a treated studio by the hour for critical sessions.
Core Podcast Studio Equipment: The Essentials You Can't Skip
Four core components drive the quality of your podcast recording more than anything else: your microphone, your audio interface or mixer, your monitoring headphones, and your recording software. Each item below includes entry-level, mid-range, and pro examples so you can match recommendations to your budget.
Microphones: Dynamic vs Condenser for Podcasting
A dynamic microphone is less sensitive by design - it handles loud sources well, rejects background noise more effectively, and needs less acoustic treatment to sound good. Dynamic microphones are better for untreated rooms, which is where most home podcasters record. A condenser mic captures more detail and higher frequencies, but it also picks up more of the room: reflections, hums, the air conditioner cycling, keyboard clicks. Condenser mics demand better treatment and more careful mic placement.
Under $100: The Audio-Technica ATR2100 at around $67 and the Samson Q2U at approximately $70 are hybrid USB/XLR dynamics that give most beginners an excellent starting point. USB microphones are ideal for solo creators who want plug-and-play simplicity.
$100–$300: Broadcast-style dynamics like the Shure MV7, Electro-Voice RE320, or Røde PodMic. These deliver richer, more polished voice reproduction and pair well with a decent audio interface.
$300+: The Shure SM7B at $399 remains a standard in professional podcast production - but it demands a clean preamp with enough gain and a well-treated room to justify the investment.
USB vs XLR: A USB mic on a boom arm is enough for a solo creator just getting started. An XLR chain (mic → XLR cable → preamp/interface) gives you more control over gain staging, routing, and future upgrades. Move to XLR when you need to support multiple people or want better processing options.
- Polar pattern: Cardioid is preferred for most podcast studios - it picks up sound from the front and rejects room reflections from the sides and rear.
- Mic distance: Microphones should be positioned 2–6 inches away from the speaker's mouth, slightly off-axis to reduce plosives. Good microphone technique improves audio clarity and reduces pops.
- Pop filter or windscreen: A pop filter catches bursts of air from "p" and "t" sounds. Inexpensive and effective - no reason to skip one.
Audio Interfaces and Mixers
An audio interface converts microphone signals into digital audio, provides gain control, delivers phantom power for condenser mics, and usually includes headphone monitoring outputs. A mixer or podcast console adds the ability to mix multiple channels live, apply onboard effects (EQ, compression), trigger sound pads, and sometimes integrate video routing - beneficial for multi-host shows or live streaming. Some all-in-one units also offer more features for routing, onboard processing, and live production than a basic interface.
Channel counts: Solo or duo shows need one to two inputs. Roundtable or panel formats require four or more. Each input should have its own gain knob for independent control.
When to choose a simple USB interface: You're a solo host with limited budget and a straightforward setup. A two-input interface in the $100–$200 range covers most duo shows comfortably.
When to choose a podcast mixer/recorder: You need onboard processing, multiple headphone outputs, the ability to stream live, or built-in sound pads. The RODECaster Pro costs around $500 and supports multiple inputs - it's an all-in-one solution many podcasters use as the center of their studio.
Features that matter:
- Quiet preamps (especially important for high-gain mics like the SM7B)
- Separate headphone outputs for each host
- Low latency with direct monitoring
- At least 24-bit/48 kHz sample rate
- USB-C connectivity
- Onboard recording to SD card (for backup)
Headphones and Monitoring
Closed-back headphones prevent sound leakage during recordings - open-back designs let sound escape into your mic, and wireless models introduce latency. Closed-back, wired headphones are essential for monitoring audio during recordings. Monitoring audio during recording prevents issues with sound quality - you'll catch hums, clipping, interference, and connection problems before they ruin an entire podcast episode.
Budget (~$50–$100): Audio-Technica ATH-M40x or similar M-series models offer solid isolation and sound accuracy at an accessible price.
Mid-range (~$100–$200): Beyerdynamic DT-770 or Sennheiser HD 280 provide better comfort for 60–90 minute sessions and more detailed sound reproduction.
Pro (~$200+): Focal Listen Professional or Audeze models for critical monitoring - these matter more in mixing and mastering than during live recording.
Hosts should always wear headphones. Guests should ideally wear them too, though in-person guests sometimes find them uncomfortable or visually distracting on camera. At minimum, the host needs to monitor so problems get caught immediately.
Stands, Boom Arms, and Shock Mounts
A basic tabletop mic stand is cheap but picks up every desk vibration - typing, mouse clicks, accidental bumps. A floor stand is sturdier but takes up space. A desk-mounted boom arm is the standard for most podcast setups: it positions the mic close and consistent, keeps it off reflective desk surfaces, pivots away when not in use, and looks cleaner on camera. This low-profile style is also widely used by other podcasters.
A shock mount isolates the microphone from mechanical vibrations. If you type during recording, bump the desk, or use a sensitive condenser, a shock mount is worth the modest investment. It's especially important for mics like the Shure SM7B or any large-diaphragm condenser.
Pop Filters, Windscreens, and Other Small Accessories
A pop filter (mesh or wire screen mounted in front of the mic) catches plosive bursts - the hard "p," "t," and "b" sounds that cause low-frequency thumps in recordings. A foam windscreen serves a similar purpose and is more useful in live or outdoor settings. Both are inexpensive and make an audible difference.
Cable quality matters. Use shielded XLR cables with solid connectors (Neutrik or equivalent). Avoid ultra-cheap, unshielded cables that pick up interference or degrade over time. Keep cable lengths practical - long enough to reach without tension, short enough to avoid introducing noise. The same applies to any USB cable running from interface to computer.
Other low-cost essentials:
- Power strip with surge protection
- Cable ties or velcro wraps for clean runs
- Labels for each channel and mic ("Host 1," "Guest 2")
- Spare mic clips and clamps
Recording and Editing Software for Podcast Studios
The best podcast recording software is the one you can use quickly and consistently - not the one with the longest feature list. Recording software is necessary for capturing and editing podcast audio, but it doesn't need to be complex or expensive. Split your thinking into two paths: local recording software (DAWs) for capturing and editing on your computer, and remote recording platforms for guests who aren't in the room.
DAWs for Local Recording and Editing
Entry-level tools: Audacity is a free editing software for Mac and PC - it handles basic recording, editing, and export well. GarageBand is recommended for Mac users starting out - simple interface, multi-track support, and built-in effects at no cost.
Mid/pro tools: Reaper offers deep functionality at a low one-time cost. Adobe Audition costs $20 per month through Adobe Creative Cloud and provides professional noise reduction, multi-track editing, and detailed mixing tools. Logic Pro (macOS, one-time purchase) is another strong option for creators already in Apple's ecosystem.
Key features podcasters actually use:
- Multi-track recording (separate tracks for each mic)
- Basic EQ and compression
- Noise reduction and de-essing
- Markers for edit points
- Export presets (MP3, WAV)
Choosing guidance: Solo creator on a budget? Audacity or GarageBand. Team editing across machines? Reaper or Adobe Audition. Windows vs macOS, subscription vs one-time purchase - pick what fits your workflow and stick with it.
Remote Recording and Video Capture Platforms
Remote-specific platforms like Riverside.fm record each guest locally and upload high-quality files, which eliminates the audio drops, compression artifacts, and resolution loss common with traditional video-call software. Riverside.fm records participants without compression. Zoom is free for recordings with one other person but records compressed audio from the call rather than locally.
Typical features of remote recording platforms:
- Separate audio and video tracks per guest
- Backup cloud recording
- Browser-based join links (no install required for guests)
- Basic editing and clip export tools
For video capture and live streaming, tools like OBS Studio (free, open source), Ecamm (macOS), and StreamYard let you composite shots, add visual branding and overlays, and stream to multiple platforms simultaneously.
Designing Your Podcast Studio Layout
Layout affects everything: mic placement relative to noise sources, cable management, guest comfort, camera angles, and how efficiently you can start and stop a session. Before placing any gear, visualize a top-down view of your room and plan where each piece fits.
Solo Desk Setup
Place your desk against a treated wall so acoustic panels or a loaded bookshelf sit directly behind you. Mount your mic on a boom arm attached to the desk, positioning it 2–4 inches from your mouth and slightly off-axis. Your monitor should sit slightly behind or to the side of the mic so you can see the screen without the mic blocking your view or your webcam's line of sight.
It's essential to choose an ergonomic workspace for comfort during recording - you may be sitting for an hour or more. Keep your keyboard and mouse away from the mic to avoid typing noise. Place your audio interface within arm's reach so you can adjust gain quickly. Run cables neatly under the desk using ties or velcro, and avoid glass or shiny desk surfaces that reflect sound.
In-Person Roundtable Setup
For two to four people, use a small round or rectangular table. Each person gets their own mic on a boom arm or individual stand, angled slightly toward the speaker and positioned so no mic directly faces another mic (to reduce bleed). Space chairs far enough apart that voices don't overlap in adjacent microphones.
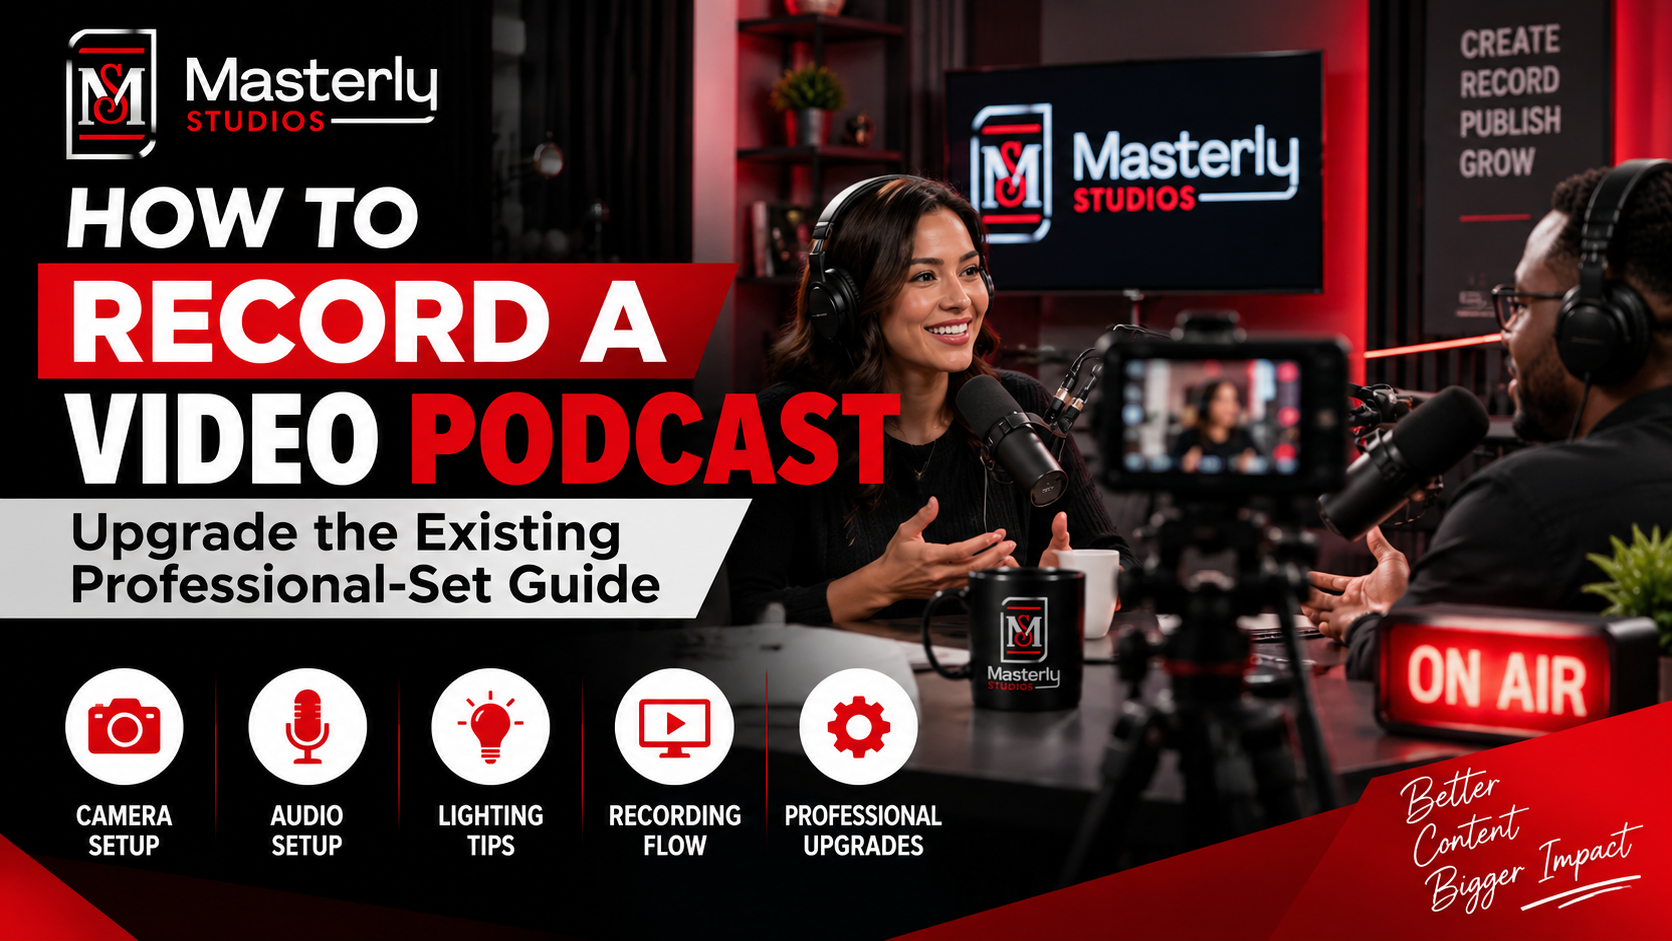
For video, a single wide-shot camera covers the full group, while individual close-up cameras on each host create more dynamic footage. Position key lights for each speaker with a shared fill light, and add a backlight to separate subjects from the background. Each person needs headphone monitoring - a headphone amp or audio mixer with multiple outputs handles this.
Hybrid and Remote-Guest Studios
When hosts are in the studio but guests join remotely, set up a separate monitor or laptop for the guest's video feed - placed near or behind the camera so the host's eyeline stays natural. The critical routing concept here is mix-minus: the remote guest should hear everything except their own voice delayed back to them, which prevents echo and feedback. A good audio interface or mixer with flexible routing handles this.
Ensure your internet connection is stable and high-bandwidth. Use a remote recording platform that captures each participant's audio locally as a backup.
Lighting, Cameras, and On-Camera Backgrounds (for Video Podcasts)
This section is for creators who want their studio to look polished on YouTube, LinkedIn, or social clips. Over 500 million users have streamed video podcasts on Spotify - up nearly 50% year-over-year - so investing in visual quality increasingly pays off. Lighting is essential for professional video podcast quality.
Basic Camera Choices for Studios
Built-in webcam or phone: If you already have one, it's a zero-cost starting point. Acceptable for early episodes.
External USB webcams: Logitech C920, Brio, or StreamCam offer 1080p or 4K with simple USB connectivity. Easy to set up, no capture card needed.
Mirrorless or DSLR cameras: Sony ZV-E10, Canon M50 Mark II, and similar bodies provide superior low-light performance, larger sensors, and interchangeable lenses. They need a capture card or clean HDMI output for streaming and recording. A mid-level video setup under $1,500 in 2026 can produce video quality that required $5,000+ just a few years ago.
Key specs to evaluate: 1080p vs 4K (4K future-proofs and allows cropping), frame rate (30 fps standard; 24 fps cinematic), low-light performance, autofocus with face or eye tracking, clean HDMI output, and continuous power options (battery eliminators) to avoid mid-session swaps.
Simple, Effective Lighting Setups
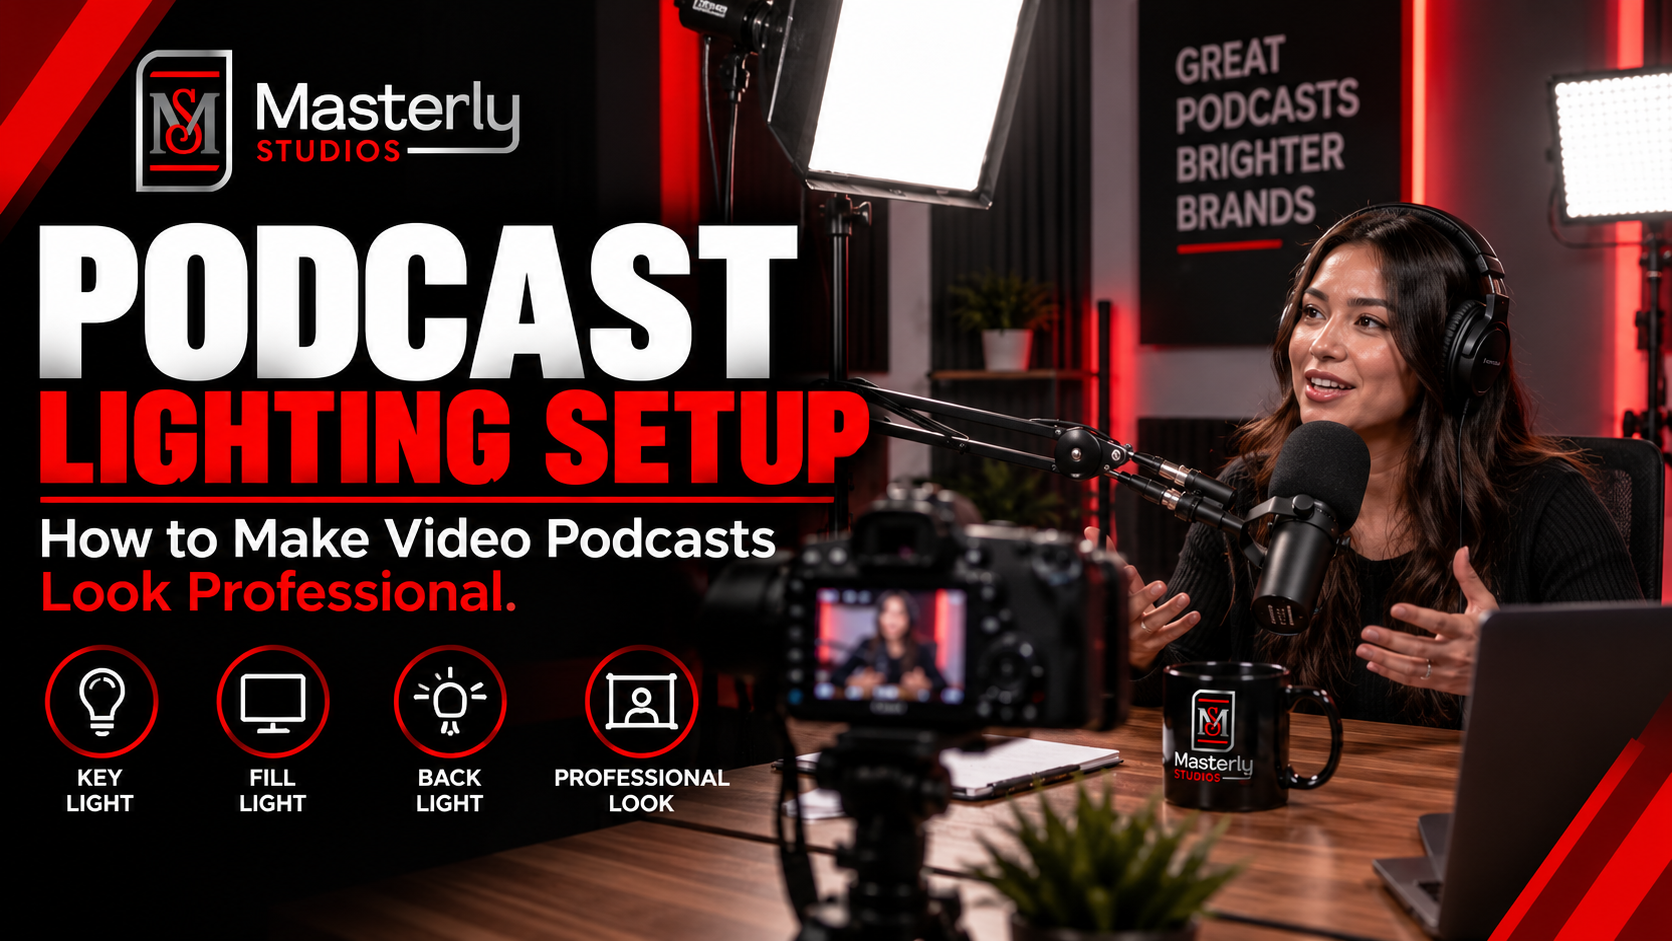
Three-point lighting remains the standard: a key light as your main, brightest source; a fill light to soften shadows on the opposite side; and a backlight or hair light to create depth and separate you from the background.
Affordable options include:
- Elgato Key Light at $199 - clamps directly to your desk for a clean setup
- Lume Cube Broadcast Lighting at $99.95 - portable and easy to position
- Soft Box lighting at around $75 - softens hard light effectively for interviews
- Selfie Ring light at approximately $90 - popular for solo setups, though it can create flat lighting without supplemental sources
In small rooms, reflectors or bounce cards can substitute for a dedicated fill light. Good LED panel kits run $80–$120 for basic setups; full softbox rigs range from $150–$400+.
Color temperature: Match all your lights to standard daylight (around 5,000–5,600K) to avoid mixed-lighting issues where warm overhead bulbs clash with cool daylight, causing skin tones to shift. Turn off any conflicting room lights or filter them to match.
Creating a Branded, Non-Distracting Background
Your background should reflect your brand identity without pulling attention from the host. Bookshelves, plants, framed artwork, acoustic panels in brand colors, and subtle logo placement all work. Accent lighting (a backlight or colored LED strip) adds visual depth and polish.
Avoid reflective surfaces behind you (glass, mirrors), overly busy patterns, or bright light sources visible in frame. Place yourself some distance from the background so it falls slightly out of focus, de-emphasizing it naturally.
A green screen allows digital background replacement but requires even, shadow-free lighting and more post-production work. Printed backdrops are simpler but less flexible. Both tend to look less natural than a real, well-designed set in budget setups.
Types of Podcast Studio Setups by Format
Different show formats impose different requirements for gear, room layout, and microphone strategy. What works for a solo show won't work for a four-person panel, and a live streaming setup has needs that a pre-recorded interview doesn't.
Solo and Co-Hosted Shows
A solo show needs minimal gear: one microphone, one audio interface (or a USB mic), one pair of closed back headphones, and a boom arm. For a co host, duplicate the mic and headphones, add a second boom arm, and make sure the two mics are directional (cardioid) and spaced apart to avoid bleed. An L-shaped or corner desk arrangement works well for two hosts on camera - it positions each person's mic angled away from the other's voice while keeping both in natural framing.
In-Person Interview and Panel Studios
Multiple people require matching microphone models for uniform audio tone - mismatched gear creates extra work in post-production with audio leveling and color correction. Each person needs their own headphone feed. A mixer or interface with enough channels (four or more inputs), mute switches, and individual gain control is essential. For video, add more cameras for different angles and position lights to cover each speaker evenly. Basic guest etiquette matters: explain proper mic distance, encourage headphone use, and ask guests to avoid bumping the table.
Remote-Only and Live Streaming Studios
When every participant is remote, stable high-bandwidth internet is non-negotiable. Use a platform that gives isolated audio and video tracks per person and cloud backup. Each participant should also record locally as insurance against dropouts. Backup recordings ensure audio quality remains intact even when connections falter.
For live streaming, add extra monitors to display chat, remote guests, and show notes. Tools like OBS or StreamYard let you add overlays, switch between scenes, and stream to multiple platforms simultaneously. Stream control hardware - macro pads or dedicated controllers - helps you manage transitions without fumbling through software menus. A reliable computer is important for recording and editing podcasts, especially when streaming and recording simultaneously.
Putting It All Together: Step-by-Step Studio Setup
Following a logical order prevents overlooked details and costly mistakes. A simple recording setup may include a microphone, interface, and headphones - but assembling it well is what separates a frustrating first session from a productive one.
Step 1: Prepare and Treat the Room
- Clear clutter and move furniture that causes reflections or blocks paths
- Lay a thick rug under the desk, hang heavy curtains over windows, and position a loaded bookshelf or absorption panels behind your speaking position
- Perform a simple clap test: stand at your planned mic position, clap sharply, and listen for echo or flutter - record with your phone and play it back to compare before and after treatment
Acoustic treatment is essential for good sound quality. Even modest treatment transforms how your room sounds.
Step 2: Assemble and Place Your Gear
- Position your desk or table relative to the treated wall; attach boom arms solidly; mount each microphone in its shock mount with pop filter in place
- Place your audio interface within arm's reach; run cables neatly under the desk and label every input ("Host 1 Mic," "Guest 2 Mic") for easier troubleshooting
- Plug in headphones and confirm monitoring output; ensure cable slack is managed and strain is relieved at connection points
Step 3: Configure Software and Levels
- Open your DAW or recording platform; select the correct input and output devices; set sample rate to 48 kHz and bit depth to 24-bit
- Name tracks logically (Host, Guest, Camera Audio) and route output to headphones
- Recording levels should be monitored to avoid clipping during captures - set gain so peaks land around −12 to −6 dBFS, leaving headroom for louder moments
- Save a template session with tracks, routing, and basic processing ready to load - this will save time on every future episode
Step 4: Run Test Sessions and Adjust
- Record two to three short test clips at different mic distances and speaking volumes; listen back on both headphones and speakers
- Identify harsh frequencies, echo, background hiss, or hum - then tweak mic position (closer/farther, more off-axis), adjust gain, and reposition treatment panels if needed
- If recording video, check lighting for shadows, glare, and exposure; adjust camera framing and white balance
- Consistency in audio levels and mic technique is crucial for cleaner sound across episodes
Testing, Backup, and Workflow Habits
Reliability comes from habits, not luck. The podcasters who never lose an episode are the ones who always test, always back up, and always have a recovery plan.
Pre-Session Checklists
Build a quick pre-flight routine and run it before every recording:
- Power on interface, preamps, and phantom power (if using condensers)
- Check all cable connections - give each a gentle tug to confirm it's seated
- Verify sample rate and bit depth in your software
- Record a 10–20 second test at normal speaking volume and play it back immediately to detect hums, clipping, or noise
- Confirm headphone volume; verify video framing if applicable
- Check that recording is going to the correct tracks (local and remote)
Create a printed or digital version of this checklist. Tape it to the wall or pin it to your desktop - routine prevents the mistakes that cost you one podcast episode or more.
Backup and File Management
Use the 3-2-1 rule: three copies of every recording, on two different media (local drive + external SSD), with one copy offsite or in cloud storage.
Establish a consistent folder structure:
Project → Season/Show Name → Episode Date and Number → Raw / Edits / Masters
Use naming conventions like ShowName_S01E05_2026-09-22_HostGuest so files are instantly identifiable months later. For video, back up full camera card contents even if you don't use every frame.
Maintaining Your Studio
- Dust equipment regularly; clean microphone grills with a dry brush or gentle vacuum - moisture and debris accumulate over time
- Check shock mount elasticity, cable connectors, and headphone pads monthly for wear
- If furniture moves or new reflective surfaces are added to the room, reassess your acoustic treatment and adjust panel positions
- Refresh your background decor and lighting setup periodically to keep your video looking current and on-brand
Example Podcast Studio Setups by Budget
These three packages reflect realistic 2026 pricing so you can match your setup to your budget and goals. A basic podcast studio setup can start around $500 - and sound genuinely good if you handle space and treatment well.
Starter Audio-Only Desk Studio (Tight Budget)
Who it's for: Solo host or duo just getting started, audio-only show, tight budget. Estimated cost: $200–$500
- One dynamic USB mic like the Samson Q2U (~$70) - or two if you have a co host
- Basic boom arm and pop filter
- Closed-back headphones (~$50–$80)
- Free DAW: Audacity or GarageBand
- DIY acoustic treatment: thick rug, heavy curtains, bookshelf behind the mic
- If upgrading to XLR: a simple two-input interface (~$100–$200)
This setup can live in a small bedroom or home office and be assembled in an afternoon. It won't win any studio design awards, but it will create more content with good quality audio than most listeners can distinguish from setups costing five times as much.
Growing Video Podcast Studio (Mid-Range)
Who it's for: Creators wanting both audio and video, hosting occasional guests, producing weekly content. Estimated cost: $1,500–$3,000
- Audio: 1–2 XLR dynamic microphones, a solid 2–4 channel audio interface with clean preamps, quality boom arms, mid-range headphones (Beyerdynamic DT-770 or similar)
- Video: External USB webcam or entry-level mirrorless camera with capture card, two-light setup (key + fill - e.g., Elgato Key Light + Soft Box), simple branded background
- Room: Acoustic treatment on key reflection points and ceiling, bass traps in corners, better cable management throughout
- Software: Mid-tier DAW (Reaper or Adobe Audition), remote recording platform for guest episodes
In-Person Interview Studio (Pro-Level)
Who it's for: Professional podcast production facilities, serious creators with regular publishing schedules and recurring guests. Estimated cost: $5,000–$30,000+ depending on ambition
- 3–4 matching XLR microphones through a multi-input interface or podcast mixer (e.g., RODECaster Pro or higher), each with its own boom arm, shock mount, and headphone feed
- Multi-camera video production: wide shot plus two close-up cameras, dedicated studio lighting (softboxes or high-end LED panels), live switching or multicam editing software
- Fully treated room across all surfaces with possible soundproofing for external noise
- Advanced background and set design - built for consistent, polished look across every episode
- Significant investment in cabling, monitor speakers, spare hardware, and backup systems
- Designed for repurposing clips across multiple platforms
Editor preferences in 2026 increasingly value uniform matching in cameras and microphones - mismatched gear creates extra post-production work in color correction and audio leveling. Buying matching models early tends to yield long-term savings.
Frequently Asked Questions About Podcast Studio Setup
These are the specific doubts that most often delay people from building their own podcast studio or upgrading an existing one.
How much does it really cost to build a podcast studio?
- Starter (audio-only): $200–$500 for a USB mic, headphones, free software, and basic room treatment
- Mid-range (audio + video, dual host): $800–$2,000 for XLR mics, a quality interface, lighting, webcam or entry camera, and commercial acoustic panels
- Pro (multi-mic, multi-camera): $3,000 and above - often well into tens of thousands for full video production setups
- Great audio is absolutely achievable at the lower end if you handle the right space and treatment properly
What is the single most important part of a podcast studio setup?
- The recording environment - your room, acoustic treatment, and mic technique - has the biggest impact on sound quality, even more than premium gear
- A modest mic properly placed in a treated room will sound better than an expensive mic in a noisy, echoey space
- Invest in your room before investing in upgrades
Do I need a separate room, or can I use my existing office/bedroom?
- Many successful podcasts record in multipurpose rooms - what matters is converting the space into "recording mode" each session
- Close doors and windows, turn off noisy appliances, add portable panels or blankets, and choose the quietest time of day
- Smaller rooms (100–150 square feet) control background noise better and are easier to treat
Should I start with video, or add it later?
- Many podcasters start audio-only to simplify workflow and master the production basics, then add video once they have a consistent publishing rhythm
- If your show depends on visual demos, on-screen brand presence, or creating clips for YouTube and social platforms, planning for video from day one is worth the upfront complexity
- Starting audio-first builds foundational quality that carries through when video is added
Can I set up a studio in a rented apartment without damaging walls?
- Use freestanding panels, heavy curtains hung on tension rods, thick rugs, and filled bookshelves for acoustic treatment - all renter-friendly and removable
- Reusable adhesive hooks support lightweight panels without drilling
- Seal doors with weatherstripping and use door draft stoppers
- Portable studio furniture and foldable backdrops can be stored when not recording
Conclusion: Start Simple, Upgrade Strategically
The right gear matters - but it matters less than the right space, thoughtful acoustic treatment, and consistent mic technique. Most beginners overinvest in equipment and underinvest in their room. Flip that priority and your podcast will sound better from day one.
A small, well-thought-out setup today can grow into a polished professional podcast studio over time. Every upgrade builds on the foundation you've already laid. You don't need to go all in on day one.
Choose your room this week. List what you already own. Identify one concrete upgrade - a rug, a set of panels, a better pair of headphones - and make it happen. That single step moves you from planning to podcasting.
Invite readers who do not want to build everything themselves to tour the studio
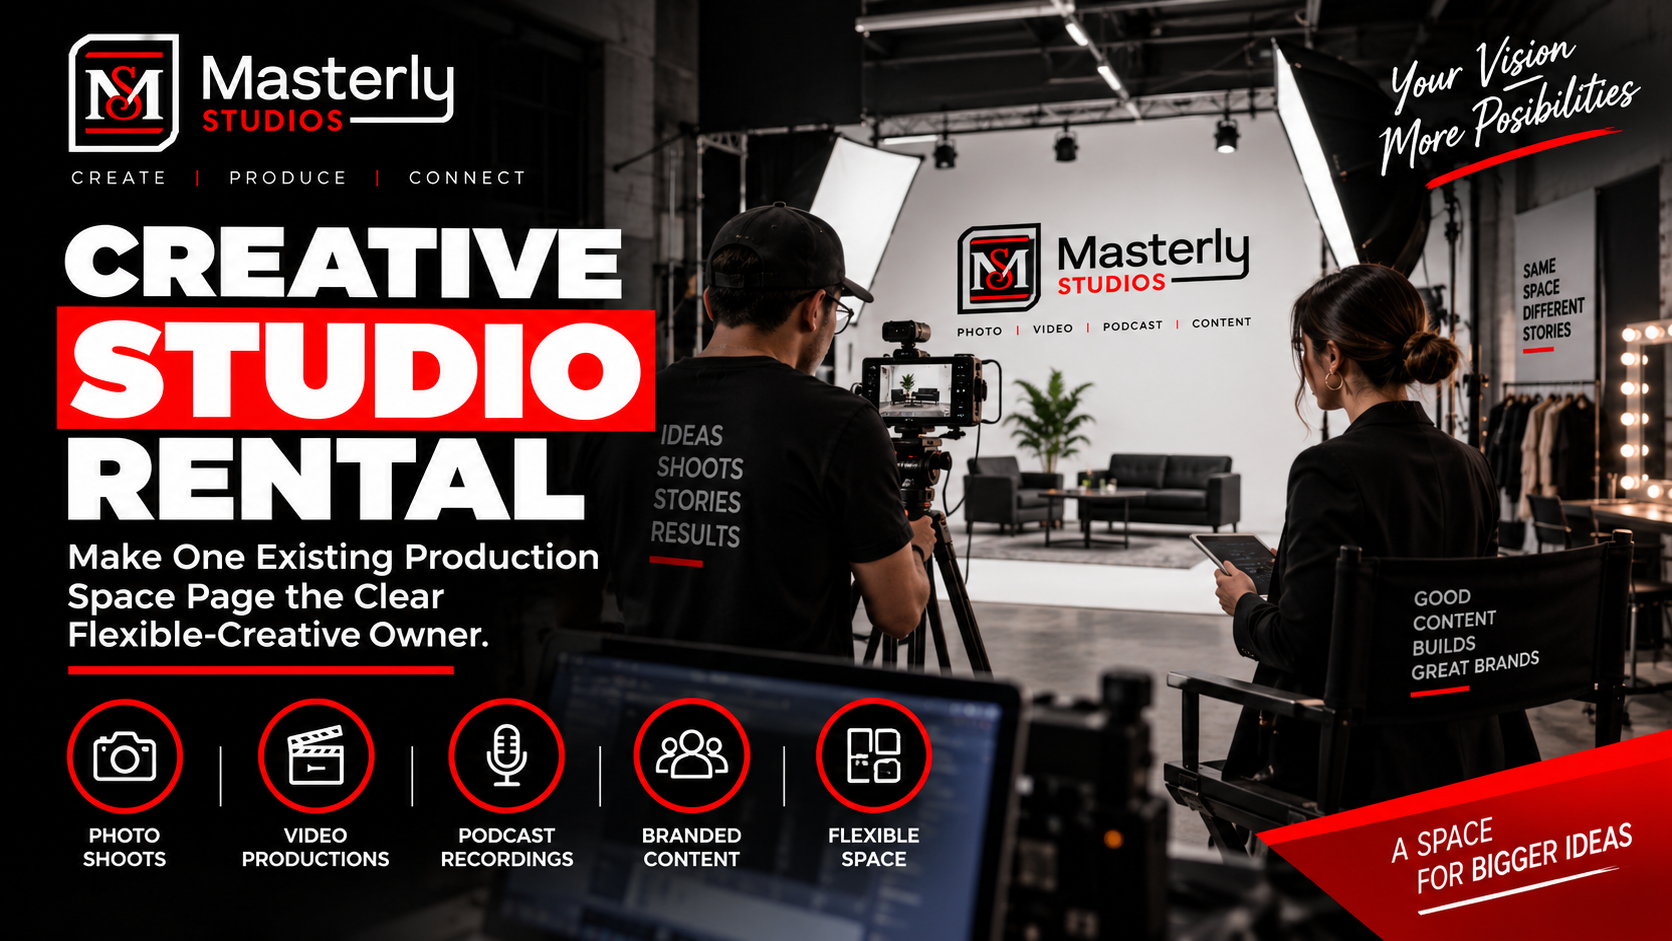
If you want professional podcast content without taking on the work of building and managing an entire recording environment, Masterly Studios can provide the space and production-ready environment you need.
Tour the studio to see how a professional podcast studio setup can support your interviews, business podcast, video content, and brand.
Masterly Studios
Phone:
(404) 726-7261
Website:
www.masterlystudios.com
Contact Masterly Studios to schedule a tour and explore the recording space for your next production.